Éclairage du poulailler pour la production d'œufs
Vos poules pondent-elles moins d'œufs lorsque les jours raccourcissent en hiver ? Vous n'êtes pas seul. La diminution de la durée du jour perturbe leur horloge biologique et leur indique qu'il est temps de ralentir la ponte. Mais la bonne nouvelle , c'est que cette baisse naturelle n'est pas permanente et qu'il est tout à fait possible d'y remédier grâce à un éclairage adapté au poulailler .
Dans ce guide, vous apprendrez à installer un système d'éclairage qui imite les conditions idéales de la lumière du jour , sans équipement coûteux ni câblage complexe. Vous découvrirez :
✅ Durée, luminosité et spectre lumineux scientifiquement prouvés pour une production d'œufs maximale
✅ Un guide étape par étape pour l'éclairage de votre poulailler, à reproduire dès aujourd'hui.
✅ Les meilleurs éclairages LED à spectre rouge et systèmes de minuterie pour des résultats constants
✅ Des plans d'éclairage saisonniers pour que vos poules pondent toute l'année
Levons le voile — au sens propre comme au figuré — sur la façon de ramener votre troupeau à une productivité optimale.
Table des matières
Comment la lumière contrôle la production d'œufs chez les poules
Comment la lumière influence la ponte des œufs – Explications scientifiques
Les trois piliers d'un éclairage productif pour poulailler
Plan d'installation d'éclairage pour poulailler, étape par étape
Guide des éclairages saisonniers pour poulailler (hiver, été, printemps/automne)
Les 3 erreurs les plus fréquentes et leurs solutions concernant l'éclairage des poulaillers
Comment la lumière contrôle-t-elle la production d'œufs chez les poules ?
Vos poules cessent-elles soudainement de pondre à l'arrivée de l'hiver ? Ce n'est pas parce qu'elles sont malades ou qu'elles ont trop froid, mais parce que leur organisme réagit à la lumière , et non à la température.
Les poules sont sensibles à la lumière. Lorsque la durée du jour descend en dessous de 12 heures environ, leur horloge biologique envoie un signal pour ralentir, voire interrompre complètement, la ponte. Il s'agit d'un instinct de survie naturel, mais cela devient problématique lorsqu'on compte sur une production d'œufs régulière.
La bonne nouvelle ? Vous pouvez contrôler cet interrupteur.
En fournissant chaque jour la bonne quantité de lumière artificielle — sans modifier l'alimentation, la race ou le logement —, vous pouvez maintenir une ponte normale des poules même pendant les mois les plus sombres.
Seulement 14 à 16 heures de lumière par jour peuvent suffire à ce que la ponte reprenne en 1 à 2 semaines.
Aucune rénovation majeure de la grange n'est nécessaire ; il suffit d'un éclairage adéquat en termes de durée, de luminosité et de spectre.
Les résultats sont probants : les exploitations agricoles constatent systématiquement une augmentation de 15 à 30 % de la production d’œufs grâce à un éclairage correctement géré.
Ensuite, analysons le mécanisme scientifique qui explique comment la lumière active le système reproducteur d'une poule, afin que vous compreniez exactement pourquoi cette méthode fonctionne.
Pourquoi la lumière influence la ponte des œufs – Explications scientifiques
Pour les poules, la lumière n'est pas qu'une simple question de visibilité : c'est le mécanisme essentiel qui contrôle leur système reproducteur. Pour comprendre pourquoi l'éclairage est si efficace pour stimuler la ponte, il est nécessaire d'étudier comment les poules perçoivent la lumière et comment leur organisme y réagit hormonalement.
1. Photopériode et horloge biologique de la poule : pourquoi 14 à 16 heures représentent la période idéale
Les poules sont des animaux photopériodiques , ce qui signifie que leur organisme réagit aux variations de la durée du jour. Dans la nature, elles pondent davantage d'œufs au printemps et en été, lorsque les jours sont longs, et cessent de pondre en automne et en hiver, lorsque les jours raccourcissent.
Mais pourquoi précisément 14 à 16 heures de lumière ?
En dessous de 12 heures → les poules passent en « mode repos », économisant leur énergie au lieu de produire des œufs.
Entre 14 et 16 heures → la lumière est suffisamment forte pour activer pleinement le système reproducteur.
Plus de 16 heures → aucune ponte supplémentaire n'est produite, et l'excès de lumière peut provoquer du stress ou des picages.
Ce cycle lumineux de 14 à 16 heures se synchronise avec le rythme circadien interne de la poule et signale à son corps que c'est la saison idéale pour se reproduire.
2. Lumière → Cerveau → Hormones → Ovules
L' éclairage utilisé en aviculture pour la production d'œufs repose sur la capacité de la lumière à atteindre des photorécepteurs spécialisés dans le cerveau de la poule, et non seulement ses yeux. Voici, en résumé, la réaction en chaîne :
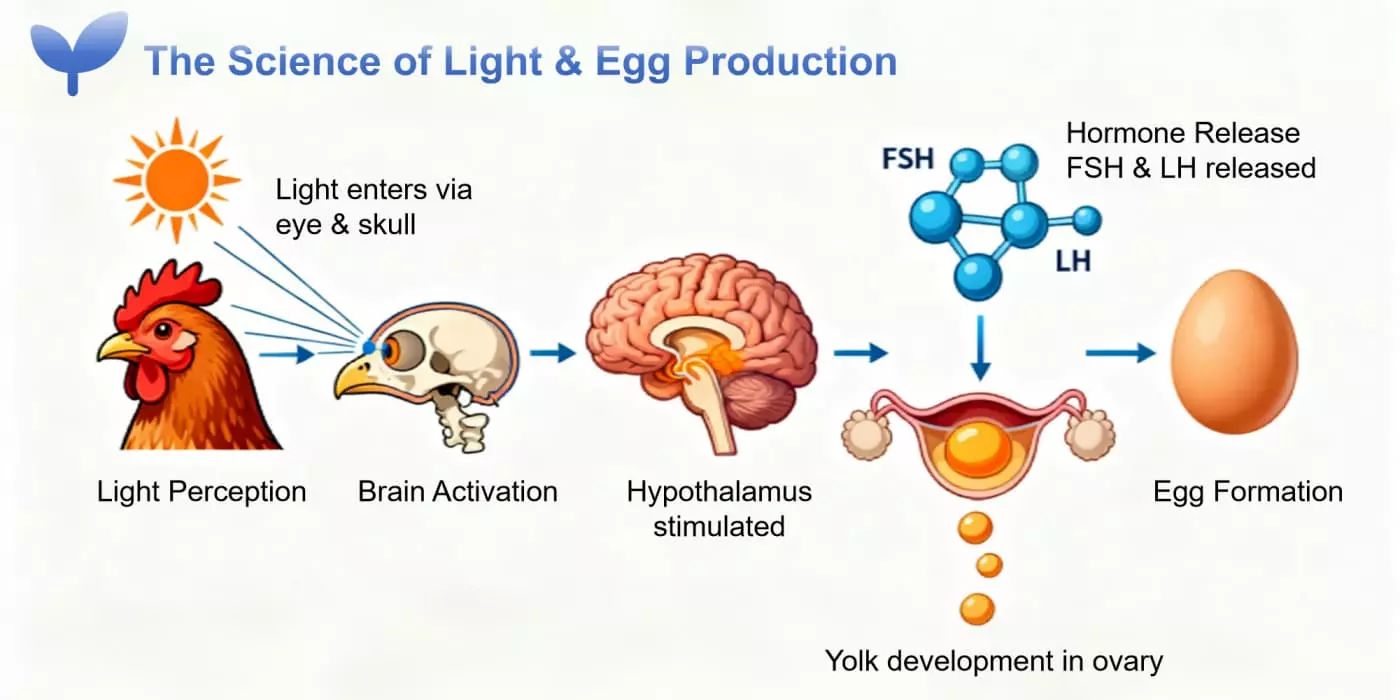
Étape 1 : La lumière pénètre par les yeux et le crâne.
Les poulets peuvent percevoir la lumière à la fois par la rétine et par la fine peau du crâne.
Étape 2 : Activation de l’hypothalamus
La lumière stimule l’hypothalamus, une partie du cerveau responsable de la régulation des fonctions biologiques comme la reproduction.
Étape 3 : L’hypophyse libère des hormones.
L’hypothalamus stimule l’hypophyse pour qu’elle libère deux hormones reproductives essentielles :
L'hormone FSH (hormone folliculo-stimulante) stimule les follicules ovariens pour qu'ils développent leur vitellus.
LH (hormone lutéinisante) – déclenche l'ovulation et la libération de l'ovule
Étape 4 : La production d'œufs commence
Une fois que les jaunes sont mûrs, ils passent par l'oviducte, où se forment l'albumen, les membranes et la coquille, produisant un œuf environ toutes les 24 à 26 heures.
✅ Ce processus ne se poursuit que si l'exposition à la lumière est constante et suffisamment longue chaque jour.
3. Pourquoi les poules cessent de pondre en hiver
En hiver, deux facteurs environnementaux majeurs nuisent à la production d'œufs :
Facteur hivernal | Effet sur les poules | Conséquence |
Durée d'ensoleillement plus courte (<12h) | L'hypothalamus reçoit une lumière insuffisante. | La production de FSH et de LH diminue |
températures froides | Le corps de la poule privilégie la chaleur et la survie. | Moins d'énergie pour la formation des œufs |
Instinct saisonnier naturel | Les poules conservent les nutriments pour leur santé, et non pour la reproduction. | La ponte des œufs ralentit ou s'arrête. |
Lorsque la durée d'ensoleillement descend en dessous de 12 heures, le taux d'hormones diminue, les follicules cessent de se développer et la production d'ovules chute considérablement.
Il ne s'agit pas d'un arrêt biologique permanent , mais simplement d'une réaction au manque de lumière. Grâce à un éclairage artificiel qui rétablit 14 à 16 heures de lumière continue, l'activité hormonale reprend et la ponte redémarre naturellement.
Pour des conseils spécifiques sur l'éclairage hivernal, consultez notre nouveau guide sur l'éclairage des poulaillers en hiver..
4. Ce que révèlent les indicateurs de recherche et de production
Études sur l'éclairage des poulaillers révéler les effets pratiques sur la production, présentés ici comme des leçons concrètes à tirer pour les agriculteurs et les jardiniers amateurs :
Indicateur | Principaux points à retenir pour les producteurs d'œufs |
Taux de production d'œufs moyen | Un éclairage constant de 14 à 16 heures contribue à maintenir une production plus élevée. Sur plusieurs mois, la ponte quotidienne reste plus stable qu'avec la seule lumière naturelle. |
Poids moyen des œufs | Le poids des œufs peut légèrement diminuer si l'exposition à la lumière augmente, à régime alimentaire constant. Veillez à un apport suffisant en protéines et en calcium pour maintenir une taille optimale des œufs. |
Taux d'œufs à coquille molle | Une lumière douce et stable réduit le nombre d'œufs à coquille molle. La lumière à spectre rouge est particulièrement efficace pour minimiser les défauts de coquille. |
Taux de cassure des œufs | Un éclairage LED uniformément réparti réduit la casse en diminuant le stress et l'encombrement autour des mangeoires ou des nichoirs. |
Conseil pratique : Associez un éclairage approprié à une alimentation équilibrée et à des transitions lumineuses progressives pour maximiser la production d’œufs et maintenir leur qualité.
Les trois piliers d'un éclairage productif pour poulailler
Pour optimiser la ponte des poules, l'éclairage ne se limite pas à allumer une ampoule. Trois éléments sont essentiels pour une ponte régulière tout au long de l'année : la durée d'éclairage, l'intensité lumineuse et le spectre lumineux . En les ajustant correctement, la plupart des poules reprendront la ponte sous 7 à 14 jours.

1. Durée d'éclairage – Maintenir 14 à 16 heures de lumière par jour.
La durée d'exposition à la lumière (ou photopériode) est le facteur le plus important pour déclencher la ponte. Les poules ont besoin de 14 à 16 heures de lumière continue par jour pour maintenir l'activité de leurs hormones reproductives.
✅ Pourquoi la cohérence est importante
L'éclairage doit être ajouté progressivement – pas de passage brutal de 8 à 16 heures.
Des changements brusques peuvent perturber l'horloge biologique de la poule , provoquant du stress, une perte de plumes ou un arrêt complet de la ponte.
La méthode recommandée consiste à augmenter la durée d'exposition à la lumière de 30 minutes par semaine jusqu'à atteindre 14 à 16 heures.
✅ Pourquoi avez-vous besoin d'une minuterie automatique ?
Il est quasiment impossible de respecter un horaire manuel : manquer une seule séance d’éclairage, le matin ou le soir, peut dérégler l’horloge interne de la poule.
➡ Solution recommandée : « C’est là qu’un contrôleur automatique, comme le contrôleur Ceramiclite IDS, intervient. »
« Devient indispensable. Il permet de programmer l’éclairage quotidien avec précision, en allumant et en éteignant les lumières à l’heure exacte, sans que vous ayez à lever le petit doigt. »
2. Intensité lumineuse : 5 à 10 lux suffisent.
Les poules n'ont pas besoin d'une lumière vive et agressive. En réalité, un excès de lumière peut engendrer du stress et de l'agressivité. Des études montrent qu'une luminosité de 5 à 10 lux — soit environ celle de la lumière du soleil tôt le matin — est idéale pour la ponte.
✅ Qu'est-ce que Lux ?
Le lux mesure la quantité de lumière visible qui atteint une surface.
5 lux = un couloir sombre
10 lux = éclairage intérieur doux
✅ Comment mesurer le lux dans votre coopérative
Vous n'avez pas besoin d'instrument de laboratoire, juste d'un smartphone et d'une application gratuite de mesure de la lumière.
Tenez-vous à la hauteur de la tête des poulets.
Vérifiez plusieurs endroits : la zone de nidification, les perchoirs, les coins.
Visez une couvrance uniforme, sans ombres marquées ni reflets vifs .
✅ Meilleurs luminaires pour une couverture uniforme
➡ « Pour obtenir un éclairage uniforme et sans ombre dans le poulailler, nous recommandons l'utilisation d'ampoules LED D80 et de lampes LED T5 pour élevage . Leur large angle de faisceau, leur faible éblouissement et leur flux lumineux stable les rendent idéaux pour les environnements avicoles. »
Ampoule LED D80 T5 LED pour éclairage de grange
3. Spectre lumineux – La lumière rouge stimule la production d'œufs
Toutes les couleurs de lumière n'ont pas le même effet sur les poules. Il a été prouvé que la lumière rouge (620–750 nm) stimule le système reproducteur plus efficacement que la lumière bleue ou la lumière blanche froide.
✅ Pourquoi le feu rouge fonctionne
Les longueurs d'onde rouges pénètrent plus profondément dans le crâne, atteignant l'hypothalamus.
Cela stimule l'hypophyse à libérer davantage d'hormones FSH et LH , essentielles à la production d'ovules.
La lumière rouge réduit également les niveaux de mélatonine (l'hormone du sommeil), ce qui permet aux poules de rester actives et de pondre.
✅ Lumière rouge, blanche ou bleue
Type léger | Effet sur les poules | Recommandé? |
Lumière bleue | Apaisant, réduit les mouvements | ✔ Pour les couveuses, ✖ Ne convient pas à la production d'œufs |
Lumière blanche (froide/neutre) | Visibilité générale, effet modéré sur la pose | ✔ Acceptable |
Lumière rouge (620–750 nm) | Forte stimulation des hormones reproductives, réduit le stress | ✅ Idéal pour la production d'œufs |
✅ Produit recommandé
➡ « Pour une ponte optimale, utilisez l’ ampoule LED Ceramiclite D80 ( spectre rouge ) . Elle émet une longueur d’onde rouge scientifiquement calibrée qui favorise la production d’œufs tout en assurant le calme et le confort des poules. »
Plan d'installation d'éclairage pour poulailler, étape par étape
Pour que l'éclairage contribue réellement à la production d'œufs — et pas seulement à l'éclairage des poulaillers —, il vous faut une installation structurée. Ce chapitre vous guide pas à pas : choisir les luminaires adaptés, les installer correctement et automatiser le cycle lumineux pour une ponte régulière.
✅ Étape 1 : Calculer la taille du poulailler et sélectionner les équipements appropriés
La taille des poulaillers et la hauteur des plafonds nécessitent des luminaires et des quantités différents.
Taille de la coopérative | Zone | Luminaire recommandé | Quantité (pour 10 m²) | Notes |
Petit | < 10 m² | Tube LED Ceramiclite T5 | 1 à 2 unités | Plafond bas, câblage facile |
Moyen | 10–30 m² | Tube LED Ceramiclite T8 | 2 à 4 unités | La plupart des poulaillers de jardin |
Grand | 30–60 m² | Combinaison T8 + T5 | 4 à 6 unités | Évitez les coins sombres |
Grande grange / Haut plafond | >60 m² ou >3 m de hauteur | Lampe de grange LED Ceramiclite T21 | 1 unité pour 20 à 25 m² | Meilleure luminosité et couverture |
Pourquoi les tubes T21 pour les poulaillers ?
Ils offrent un flux lumineux plus élevé, une diffusion de la lumière plus large et sont mieux adaptés aux poulaillers avec des plafonds plus hauts (> 3 m), garantissant ainsi que la lumière atteigne le sol et les zones de nidification.
| Lampe de grange LED T5 | Projecteur LED T8 pour grange |
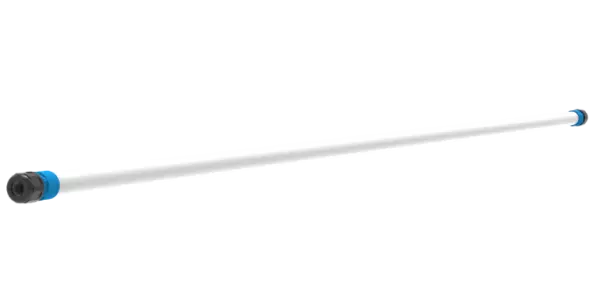 | 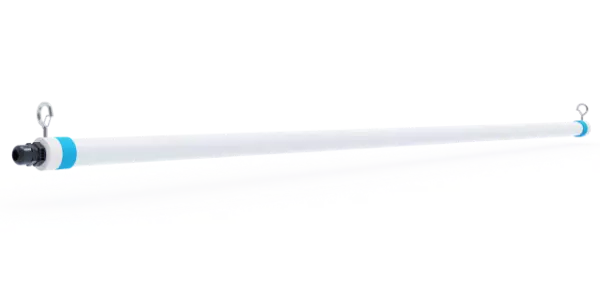 |
| Ampoule LED D80 | Lampe de grange LED T21 |
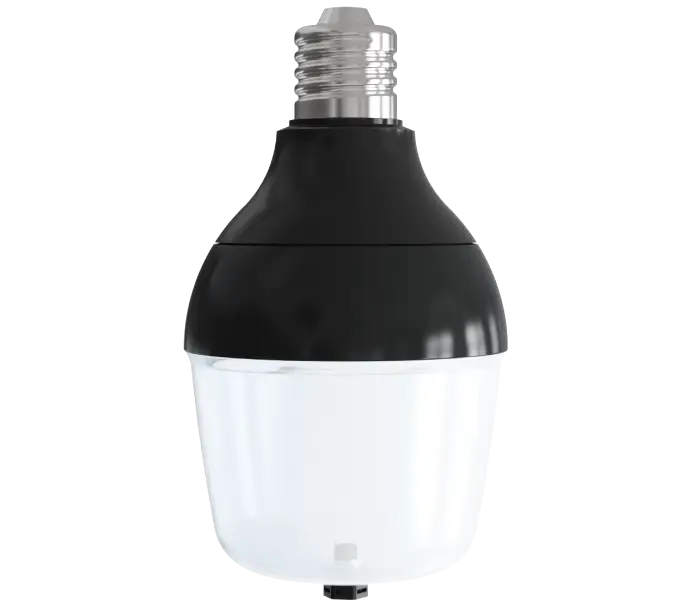 | 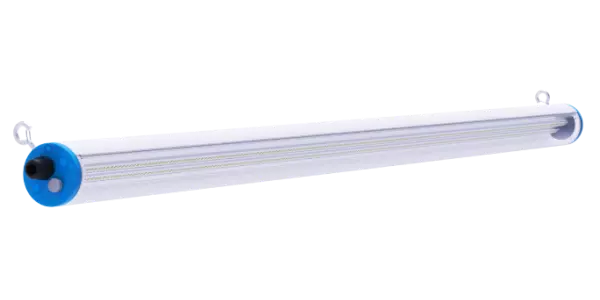 |
✅ Étape 2 : Positionnement optimal de la lumière et hauteur de montage
Objectif : Répartition uniforme de la lumière, sans ombres ni zones d'ombre.
Élément de configuration | Recommandation |
Hauteur de montage | 2 à 2,5 m dans les petits et moyens poulaillers ; 3 à 4 m dans les maisons de type grange |
Style de mise en page | Rangées linéaires pour les poulaillers étroits/en forme de cercueil ; disposition en grille pour les grandes granges. |
Espacement entre les lumières | 1,5 à 2 m entre les tubes T5/T8 ; 3 à 4 m entre les luminaires T21 |
Éviter | Éclairer directement les yeux des poules, zones d'alimentation ou de nidification sombres. |
Veillez à ce que la lumière atteigne les mangeoires, les perchoirs et les nichoirs – ce sont les zones les plus actives pour l'alimentation et la ponte.
✅ Étape 3 : Automatisation – Minuteurs et augmentation progressive de la lumière
La commutation manuelle est peu fiable et perturbe le rythme hormonal des poules. L'automatisation est essentielle pour une production d'œufs stable.
✔ Éléments à mettre en place :
Utilisez des minuteries automatiques ou le contrôleur intelligent IDS
Allumez les lumières avant le lever du soleil (par exemple, à 4h30 du matin en hiver).
Prolongez l'éclairage en soirée après le coucher du soleil afin de maintenir un éclairage total de 14 à 16 heures.
⚠ Pourquoi une augmentation progressive est importante :
Passer de 10 h à 16 h de lumière en une seule journée stresse les poules et peut temporairement interrompre la ponte.
✔ Méthode correcte : Augmenter la durée d’éclairage de 15 à 30 minutes par semaine .
✅ Exemple de programme d'éclairage hivernal
Semaine | Heures d'éclairage totales | Minuteur suggéré |
Semaine 1 | 12 h | Lumières allumées de 5h30 à 7h00 |
Semaine 2 | 12,5 h | Lumières allumées de 5h15 à 7h15 |
Semaine 3 | 13 h | Lumières allumées de 5h00 à 7h30 |
Semaine 4 | 14 h | Lumières allumées de 4h30 à 20h00 |
✅ Liste de contrôle récapitulative
✔ Choisissez l'éclairage adapté (T5, T8 ou T21 selon la taille et la hauteur du poulailler)
✔ Installez les lampes uniformément, sans zones d'ombre
✔ Fixez-les à la bonne hauteur pour une couverture optimale
✔ Utilisez des minuteurs et augmentez progressivement la durée d'éclairage
Guide des éclairages saisonniers pour poulailler (hiver, été, printemps/automne)
Les besoins en lumière varient selon les saisons. Même avec un système parfaitement adapté, un manque d'ajustements au cours de l'année peut engendrer du stress, une baisse de la ponte ou une surstimulation. Ce guide saisonnier vous permettra d'assurer une ponte régulière et confortable à vos poules.
1. Hiver – Ajouter un éclairage le matin ou le soir pour maintenir 14 à 16 heures d'éclairage.
Les journées d'hiver sont courtes, ne durant souvent que 8 à 10 heures. Sans éclairage artificiel, les poules cessent naturellement de pondre.
Stratégie d'éclairage :
✔ Ajouter de la lumière artificielle tôt le matin (par exemple, entre 5 h et 6 h) ou en début de soirée.
✔ Maintenir une exposition totale à la lumière entre 14 et 16 heures par jour .
Pourquoi la lumière du matin est meilleure :
L'éclairage nocturne peut s'éteindre subitement, laissant les poules dans l'obscurité avant qu'elles ne se perchent, ce qui provoque du stress.
La lumière du matin imite naturellement le lever du soleil et aide les poules à se réveiller progressivement.
Conseils clés pour l'hiver :
Utilisez une minuterie automatique ou un contrôleur IDS pour éviter les erreurs humaines.
Augmentez progressivement la durée d’exposition à la lumière – pas plus de 30 minutes par semaine .
Veillez à ce que le poulailler reste sec et sans courants d'air ; la lumière seule ne peut compenser un mauvais logement.
2. Été – Prévenir la surexposition et le stress thermique
L'été offre naturellement de longues journées d'ensoleillement, parfois plus de 15 à 16 heures. Un éclairage supplémentaire n'augmentera pas la production d'œufs et risque de surstimuler les poules.
Stratégie d'éclairage :
✔ Ne pas dépasser 16 heures d'éclairage total .
✔ Prévoir un ombrage naturel ou des rideaux occultants si la durée d'éclairage est trop longue.
Conseils clés pour l'été :
Une exposition à la lumière pendant plus de 16 heures peut accroître l'agressivité, les coups de bec et le stress.
Assurez une ventilation adéquate : la lumière augmente l'activité, ce qui signifie plus de chaleur.
Évitez les lumières trop vives ; 5 à 10 lux suffisent même en été.
3. Printemps et automne – Saisons de transition = Ajustements en douceur
Le printemps et l'automne sont les meilleures périodes pour ajuster progressivement l'éclairage et préparer les poules aux changements de saison.
Stratégie d'éclairage :
✔ Augmentez la durée d'éclairage de 30 minutes par semaine jusqu'à atteindre 14 à 16 heures.
✔ Effectuez toujours les modifications à la même heure chaque semaine ; la régularité est essentielle.
Conseils clés pour le printemps et l'automne :
Au début de l'automne, commencez à ajouter de la lumière avant que les poules n'arrêtent naturellement de pondre.
Au printemps, maintenez un éclairage constant pour éviter les fluctuations hormonales.
Évitez les réductions brutales de l'éclairage, car elles peuvent provoquer la mue ou perturber le cycle de ponte.
✅ Tableau récapitulatif de l'éclairage saisonnier
Saison | Stratégie d'éclairage | Conseils clés |
Hiver | Ajoutez de la lumière du matin/soir pour atteindre 14 à 16 heures. | Utilisez des minuteurs ; évitez les extinctions brutales ; augmentez progressivement la durée d’éclairage. |
Été | Limiter l'éclairage à 16 h maximum au total ; prévoir un ombrage. | Prévenir le stress thermique et la surstimulation |
Printemps / Automne | Augmenter la luminosité de +30 min/semaine | Transitions fluides ; maintenir la cohérence |
Les 3 erreurs les plus fréquentes et leurs solutions concernant l'éclairage des poulaillers
Même les éleveurs de volailles expérimentés commettent des erreurs d'éclairage qui réduisent la production d'œufs. La bonne nouvelle ? La plupart sont faciles à corriger.
(1) Programme d'éclairage irrégulier
⚠ Problème :
L’éclairage est allumé/éteint manuellement ou de façon aléatoire. Cela perturbe le rythme biologique des poules et réduit la production de FSH (hormone folliculo-stimulante), ce qui entraîne une ponte irrégulière ou un arrêt de la ponte.
✔ Solution :
Utilisez des minuteries automatiques ou des contrôleurs intelligents IDS pour maintenir un cycle d'éclairage constant de 14 à 16 heures.
Augmentez progressivement la durée d'exposition à la lumière de 15 à 30 minutes par semaine au lieu de changements brusques afin d'éviter le stress.
(2) Spectre lumineux inadéquat (trop blanc ou trop bleu)
⚠ Problème :
De nombreux poulaillers utilisent des lumières LED blanches ou bleues froides. Ces longueurs d’onde inhibent la mélatonine et ne stimulent pas efficacement l’hypothalamus et l’hypophyse, ce qui entraîne une faible ponte.
✔ Solution :
Utilisez un éclairage à spectre rouge (620–750 nm) pour stimuler plus efficacement les hormones reproductives.
Produit recommandé : Ampoule LED à spectre rouge D80 — optimisée pour les poules pondeuses et sans danger pour une exposition à long terme.
(3) Intensité lumineuse inégale ou insuffisante
⚠ Problème :
Les coins sombres du poulailler ou un éclairage inférieur à 5 lux rendent les poules inactives, les incitent à éviter les zones d’alimentation et réduisent leur ponte. Un éclairage trop intense (> 20 lux) peut également provoquer de l’agressivité et des picages.
✔ Solution :
Assurez une répartition uniforme de la lumière à 5–10 lux dans tout le poulailler.
Utilisez les tubes LED Ceramiclite T5, T8 ou T21 pour un éclairage grand angle sans scintillement.
Positionnez les luminaires au niveau du plafond, à intervalles réguliers, et mesurez la luminosité à l'aide d'une application de luxmètre pour smartphone.
Point clé à retenir :
Un timing stable + un spectre correct + une luminosité appropriée = une production d’œufs supérieure de 15 à 30 % sans équipement coûteux.
Conclusion
La lumière n'est pas qu'une question de visibilité dans le poulailler : c'est un mécanisme biologique qui régule les hormones, la formation des œufs et la productivité globale du troupeau. Un éclairage adapté (durée, intensité et spectre) permet aux poules de pondre plus régulièrement, de rester en meilleure santé et de maintenir leur production tout au long de l'année, même en hiver.
En appliquant la bonne stratégie d'éclairage, vous obtenez :
Augmentation du nombre d'œufs : 15 à 30 % en 1 à 2 semaines.
Des poules en meilleure santé : stress réduit, meilleure immunité, moins d'interruptions de ponte.
Productivité prévisible : fini les baisses saisonnières et les schémas de ponte aléatoires.
Éclairez intelligemment. Élevez plus intelligemment. Permettez à vos poules de pondre à leur plein potentiel — en toute saison, tous les jours.
Ceramiclite est toujours là pour vous aider !

_thumb.jpg)